



A dripping tap is easy to ignore for a day or two, but that steady drip wastes water, stains the sink and usually gets worse. The good news is that learning how to fix a leaky tap is one of the most satisfying DIY jobs in the home: most leaks come down to a worn washer or cartridge that costs very little and takes under an hour to replace. This guide walks you through the whole process, from working out why the tap is leaking to testing your repair like a professional.
What Causes a Tap to Leak?
Before you pick up a spanner, it helps to know what you are dealing with. A traditional tap seals the water flow with a rubber washer that presses against a valve seat. Over time the washer hardens, cracks or wears thin, and water starts to seep through even when the tap is fully off. That is the classic drip from the spout.
Modern mixer taps usually work differently. Instead of a washer, they use a ceramic disc cartridge. Cartridges last a long time, but grit in the water supply can score the discs, or the cartridge seals can perish, causing either a spout drip or a leak around the base of the lever. A leak from the base of a traditional tap, meanwhile, often points to a worn O-ring on the spindle rather than the washer itself.
Identifying the leak point matters because it decides which part you buy. Spout drip on an older tap: washer. Spout drip on a modern mixer: cartridge. Leak around the handle or base: O-ring or cartridge seals. Getting this right first saves a second trip to the shop.
Tools and Parts You Will Need
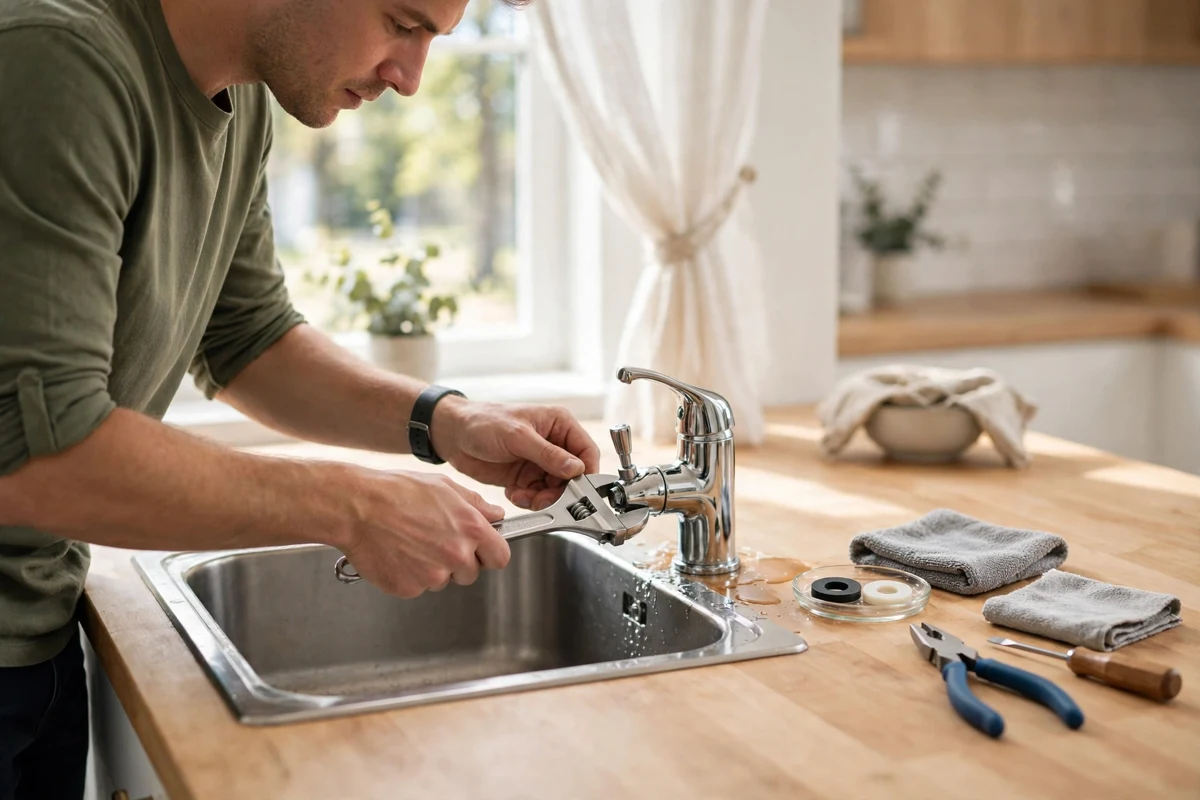
You do not need a professional toolkit to fix a leaky tap. Gather an adjustable spanner, a flat-head and a cross-head screwdriver, a cloth for protecting chrome finishes, and an old towel for spills. For parts, pick up an assorted washer kit if you have a traditional tap, or the correct replacement cartridge for a mixer tap. Cartridges are not universal, so take the old one with you to the shop or note the tap brand and model before buying.
It is also worth having some plumber’s tape and a spare O-ring kit to hand. These cost very little and cover most of the small surprises you might find once the tap is apart. While you are working on household routines, our beauty routine checklist shows the same principle in a different room: small systems, checked regularly, prevent bigger problems.
Step 1: Turn Off the Water Supply
Never skip this step. Look for an isolation valve on the pipe below the sink — many modern homes have one for each tap, and it closes with a quarter turn of a flat screwdriver. If there is no isolation valve, turn the water off at the stopcock, usually under the kitchen sink or where the main supply enters the house.
Once the water is off, open the tap fully to drain what remains in the pipe and confirm the flow has stopped. Put the plug in the sink before you do anything else. It sounds like a small thing, but it stops screws and washers disappearing down the plughole, which is how a simple job turns into a frustrating one.
Step 2: Remove the Tap Handle and Valve
Start by removing the tap handle. Many handles hide a screw under a decorative cap or under the hot/cold indicator, which you can ease off gently with a flat screwdriver. Undo the screw and lift the handle away. On some taps the handle simply unscrews or pulls off once a grub screw at the back is loosened.
Next, unscrew the valve or cartridge housing. Wrap the chrome shroud in a cloth before applying the spanner so you do not mark it. Turn the valve body anti-clockwise and lift it out. On a mixer tap, the cartridge sits inside the body and is usually held by a retaining nut or screws. Take a photo at each stage with your phone — it makes reassembly far easier, a trick that works for everything from taps to flat-pack furniture. It is the same organised approach we recommend in our guide to choosing the right dog breed: prepare properly first, and the job itself becomes straightforward.
Step 3: Replace the Washer or Cartridge
For a traditional tap, you will see the washer at the base of the valve, held by a small screw or nut. Remove it and fit the new washer of the same size, making sure it sits flat. While the valve is out, check the valve seat inside the tap body. If it feels rough or pitted, that roughness will chew through the new washer quickly, and a seat-grinding tool or a plumber is the better answer.
For a mixer tap, lift out the old cartridge and press the new one in, aligning the locating lugs with the slots in the body. If the leak was around the base, replace the O-rings on the cartridge or spindle at the same time, with a light smear of silicone grease if you have it. Refit the retaining nut or screws firmly, but do not overtighten — ceramic cartridges can crack under excessive force.
Step 4: Reassemble and Test the Tap
Refit the valve or shroud, then the handle, working in reverse order of your photos. Turn the water supply back on slowly at the isolation valve or stopcock, and watch the tap closely. Open and close it several times, checking the spout, the base and the handle for any sign of moisture.
A tiny weep that stops within a minute or two can simply be the new washer bedding in. A continued drip means something is not seated correctly — turn the water off again and check that the washer or cartridge is flat, the right way up and free of grit. Most second attempts succeed because you now know exactly what you are looking at.
When to Call a Plumber Instead
Knowing how to fix a leaky tap also means knowing its limits. Call a plumber if the valve will not budge and risks rounding off, if the tap body itself is cracked, if the valve seat is badly corroded, or if you find leaking pipework below the sink rather than a tap fault. It is also sensible to hand over the job if there is no way to isolate the water and you are not confident with the stopcock.
None of that takes away from the value of trying. In the majority of homes the fault is the washer or cartridge, and those are firmly in DIY territory. Our minimalist beauty routines guide makes a similar point about everyday upkeep: the simplest fix, done early, is usually the effective one.
How to Prevent Future Leaks
Most tap leaks are wear, not bad luck, and a few habits slow that wear down. Think of it as the plumbing version of low-maintenance beauty: choose systems that look after themselves, and check them before they demand attention. Do not force a tap tighter when it starts to drip — over-tightening crushes the washer and shortens its life. Deal with the first occasional drip rather than the tenth, because each drip is water passing a failing seal and eroding it further.
If your water is hard, limescale builds up on seats and cartridges, so a periodic descale of tap ends and aerators helps everything last longer. Keep a note of when you changed a washer or cartridge, just as you would track car servicing or the kind of organised home admin we cover in our beauty packing and organisation checklist. A simple record turns the next repair into a ten-minute job, because you will already know the part, the size and where the isolation valve is.
Fixing a leaky tap is a small job with an outsized payoff: a quieter bathroom, a lower water bill and one less thing quietly getting worse in the background. With the water isolated, the right part in hand and a methodical approach, it is well within the reach of any beginner.
